

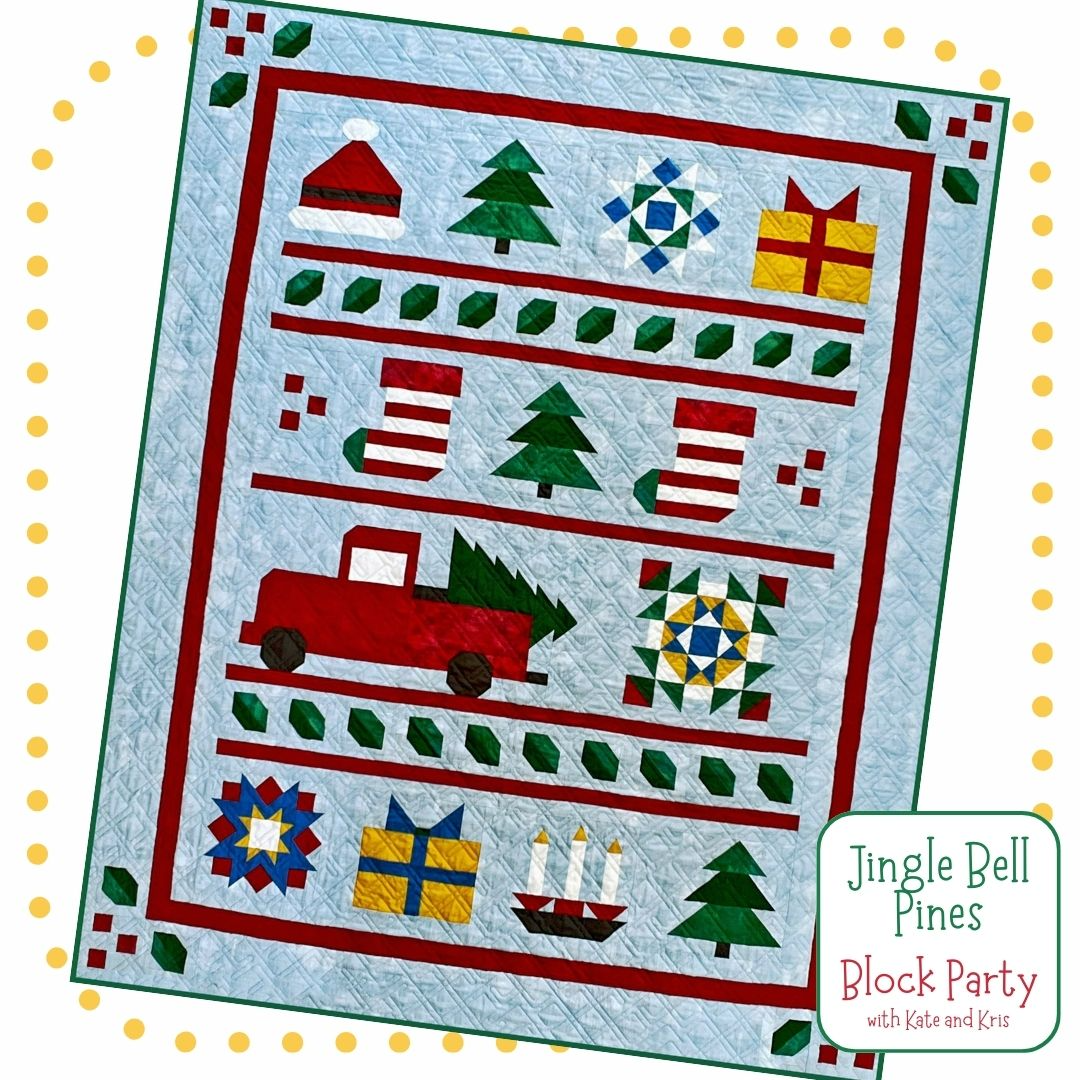
Welcome to Week 8 of the Jingle Bell Pines Block Party! We are so grateful that you stopped in!
Kate Colleran (of Kate Colleran Designs) and I are compiling tips to help you complete your Jingle Bell Pines Quilt one block at a time! We know you want to get it done for the holidays! We post tips (and more) every Thursday on Instagram and delve a bit deeper on our blogs.
We are joined by @alisonsexpressions (on Instagram) – she’s making the quilt right along with us as well, using Thatched and Dotty Thatched from @modafabrics! Loving her take on this project!
For more information on getting started (it’s not too late!) – visit my blog post here!
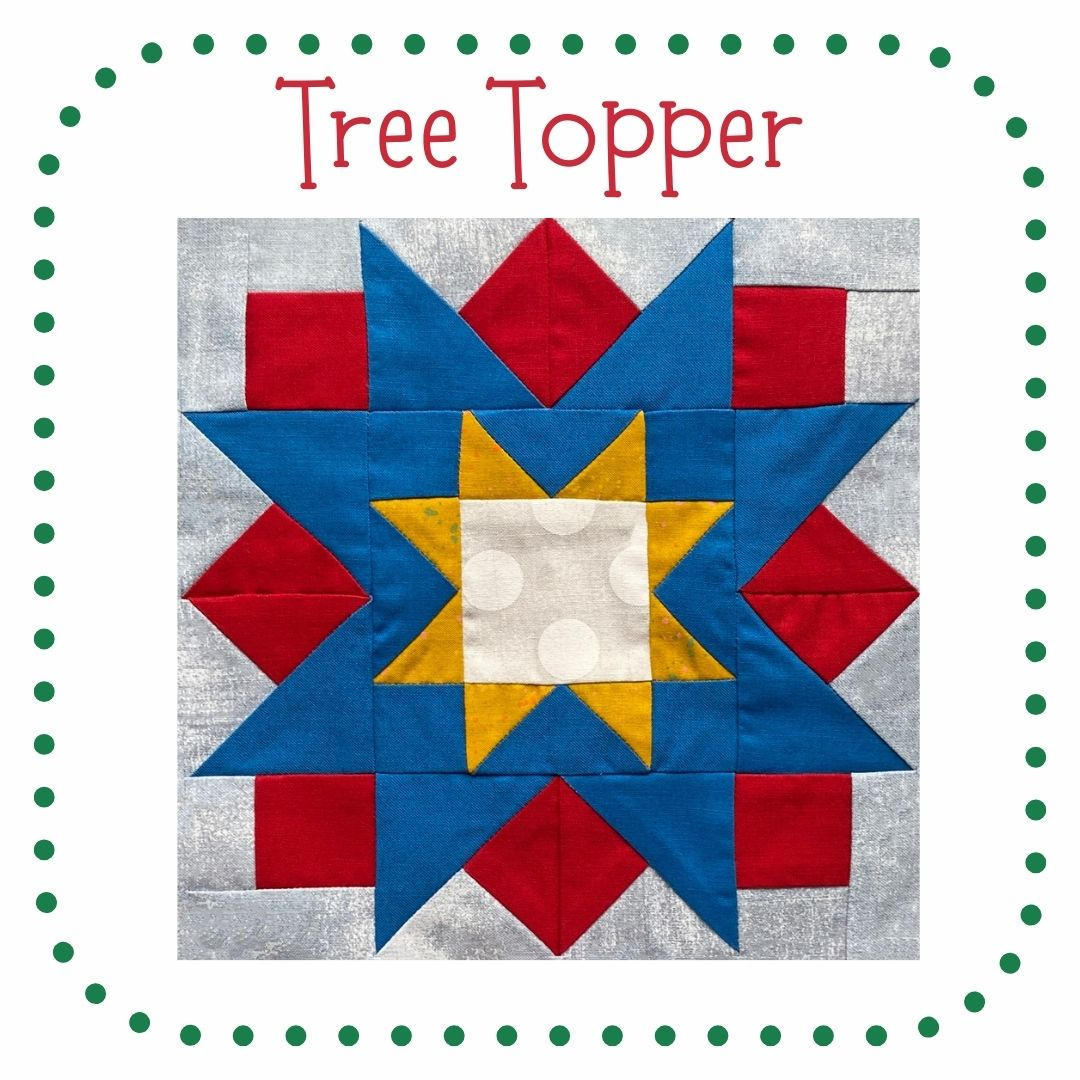
The Tree Topper block is beautiful – staring with a variable star in the middle, it radiates out and creates a frame for the center. We featured partial quarter square triangles in this block – let’s get to the details of making painless pQSTs!!
For a pQST, we’ll need to cut 1 HST and 2 QSTs:
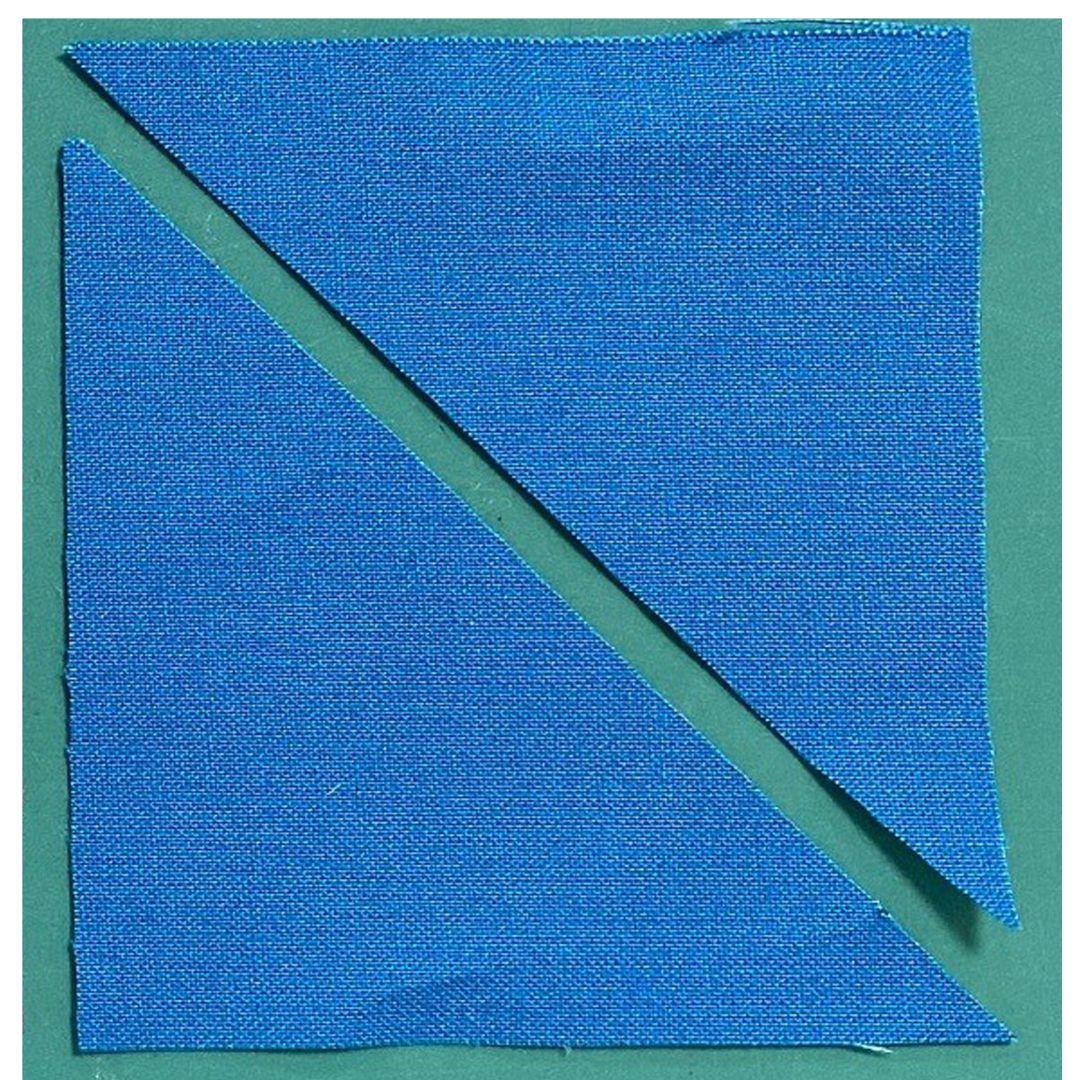
Per the pattern, we’ll sew the QSTs together. (Tip: Be careful to note the orientation of the QSTs!)
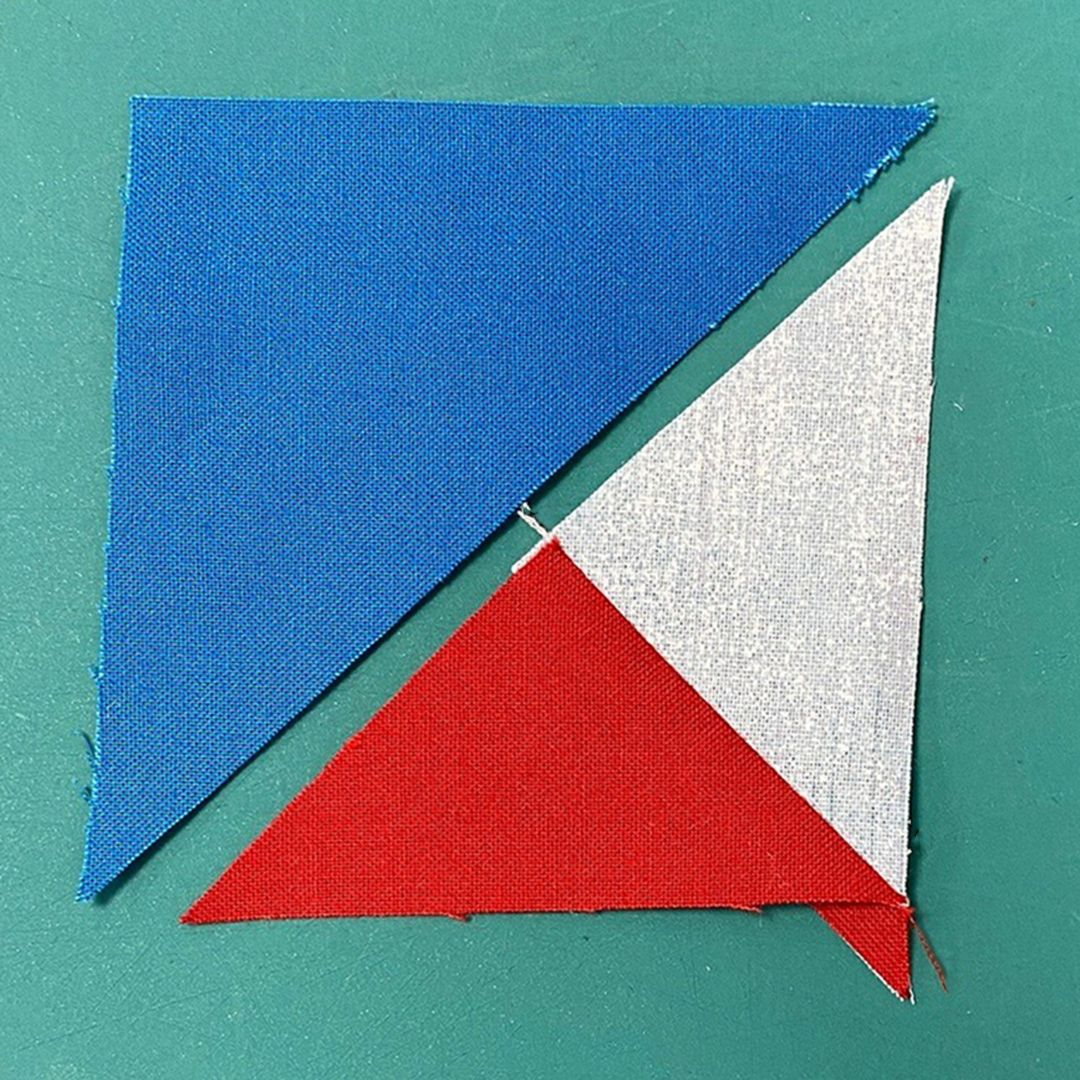
Notice that if you oversized your squares, you may see that the HST appears bigger than your QST!
That’s quite OK! Match the units at the center, then sew along the diagonal.
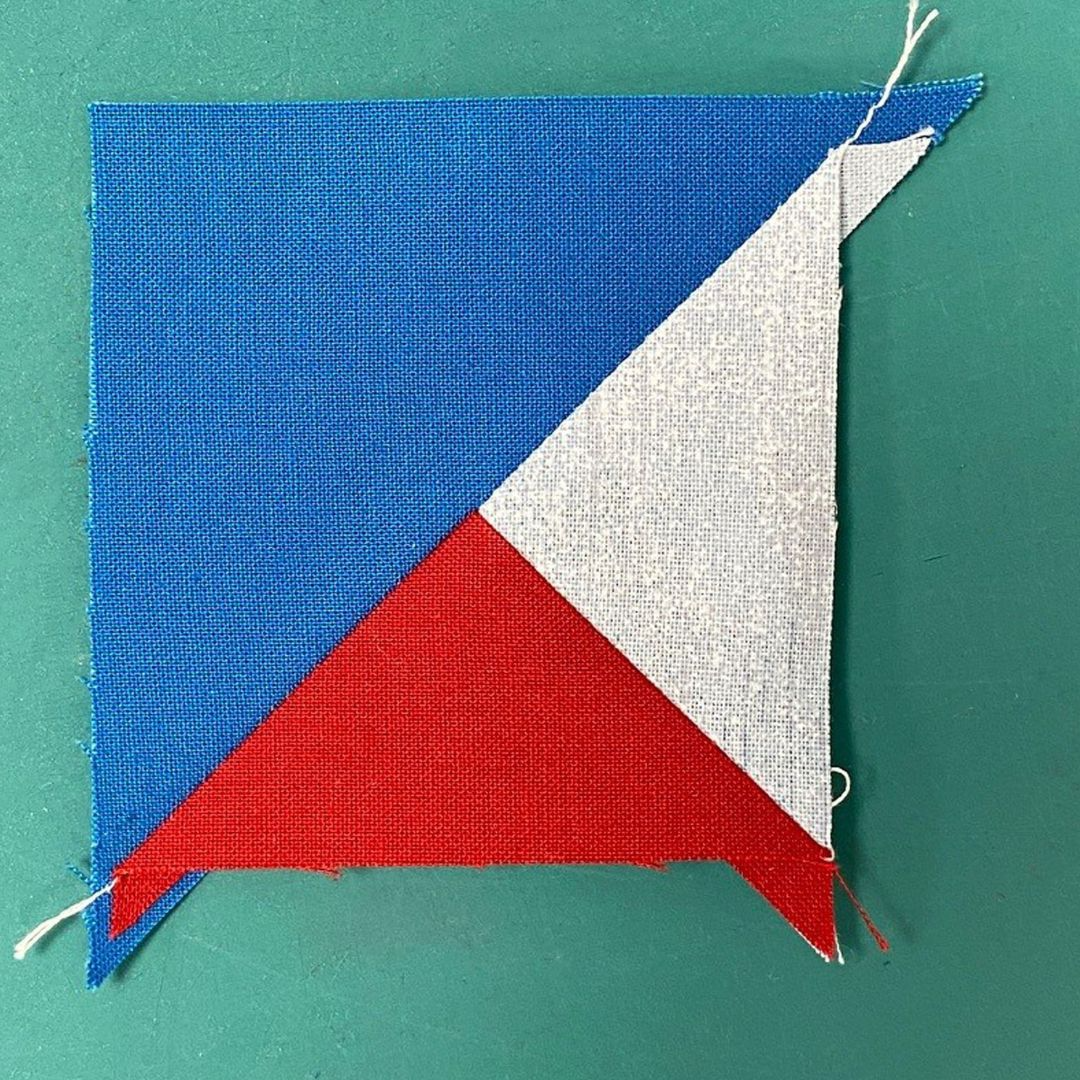
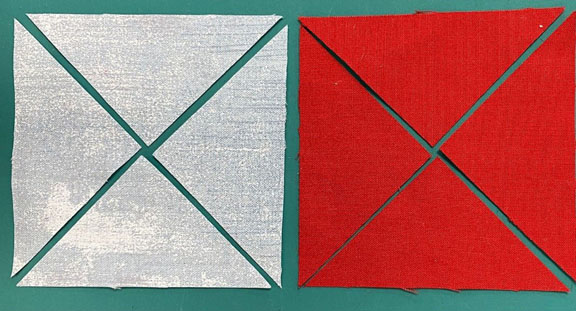
Trim, using the center for reference!
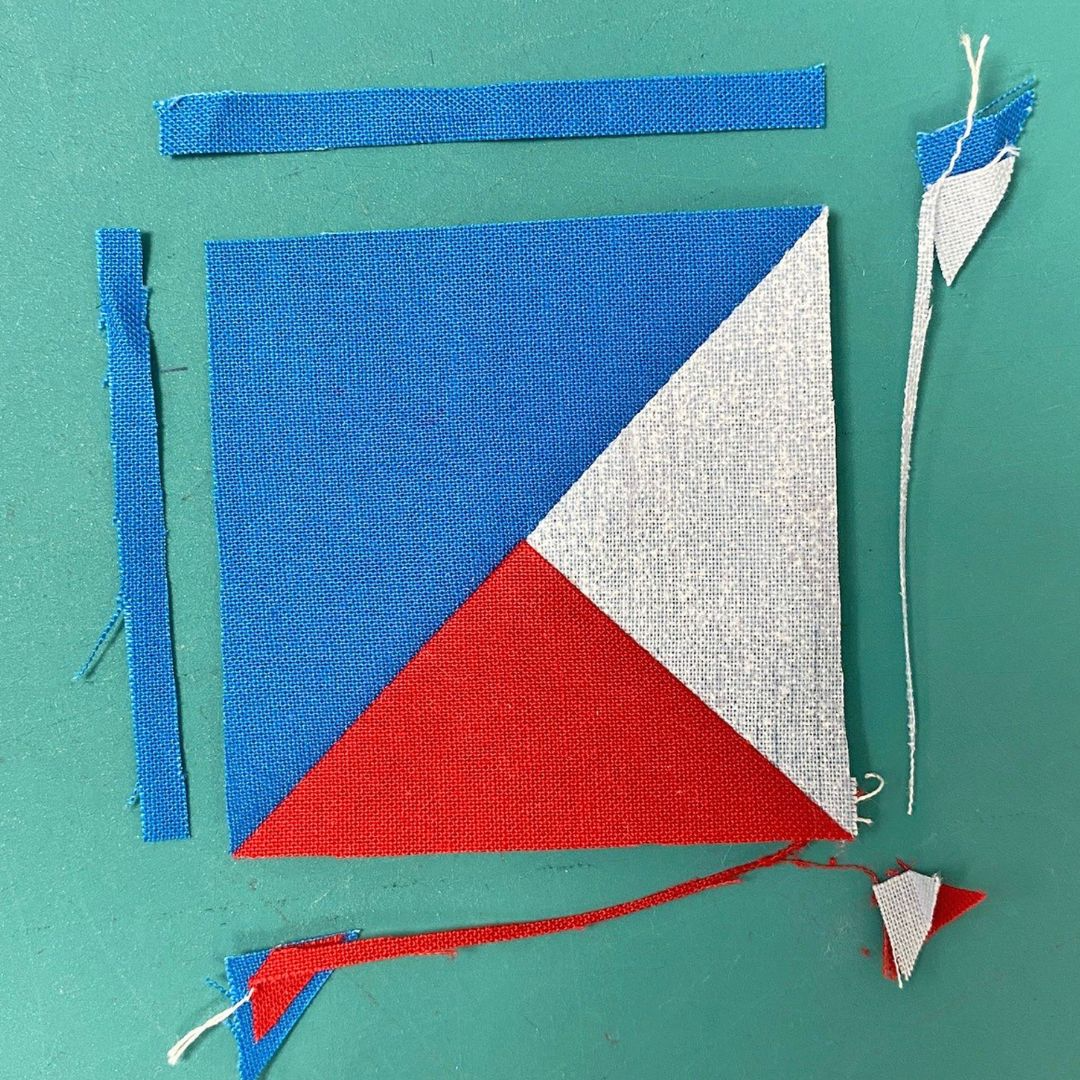
I used my favorite trimming tool (the Tucker Trimmer), but you could actually use a square ruler, positioning the center relative to the final size and trim one side at a time.
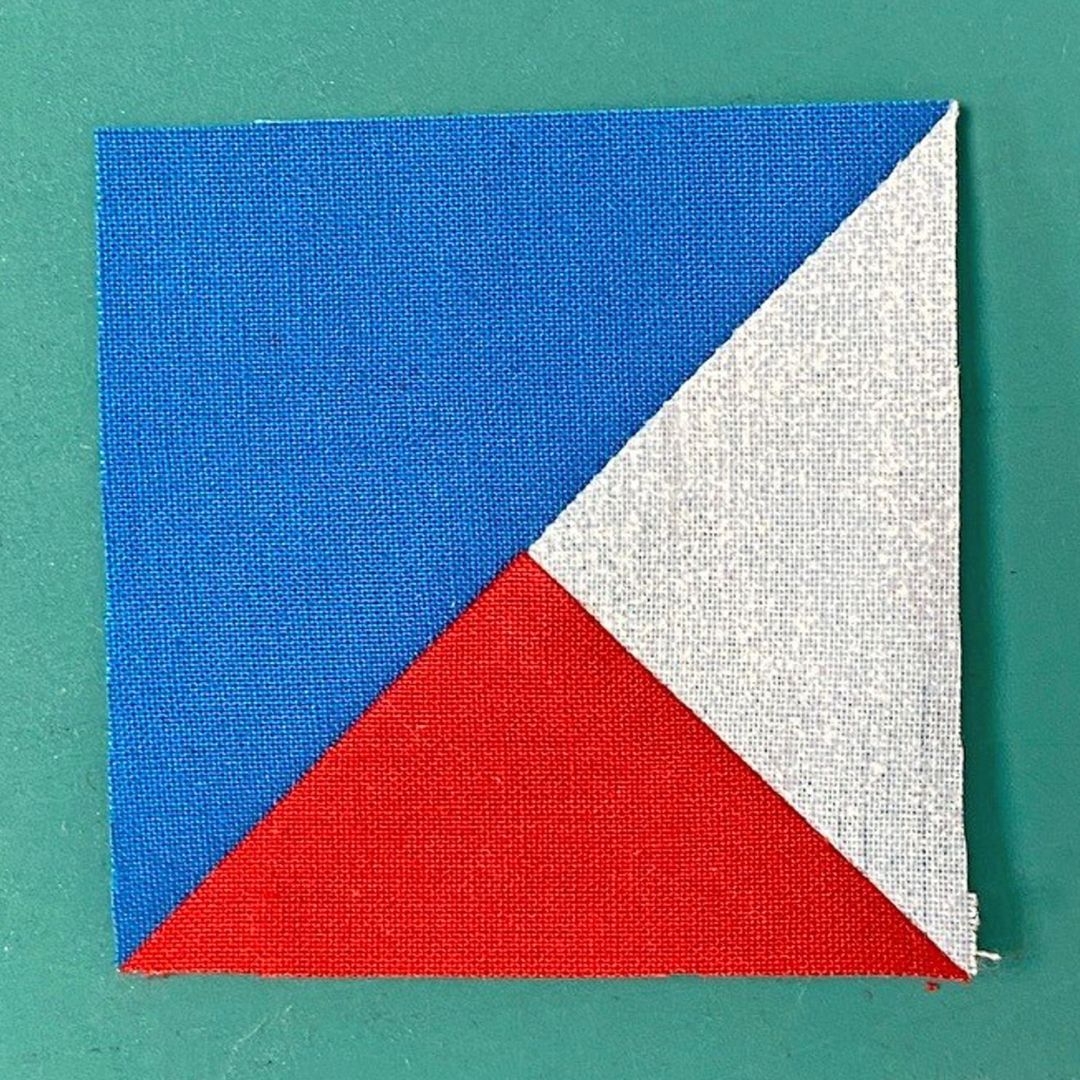
Looking at the Tree Topper block, the star beams because of the pQSTs! So easy if you know the secrets!
Here’s how the block looks with Navy or Taupe backgrounds:

I love to see these different looks! Next week is block 9 and we have rectangle triangles!
Until next time – have fun sewing your Tree Topper block! Hugs, Kris